

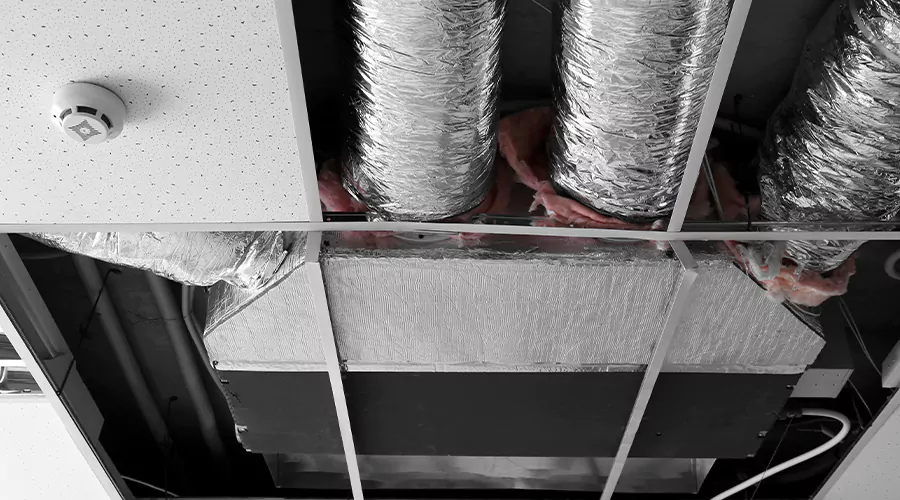
You can find leaks in air ducts by inspecting accessible joints and checking for air escaping from damaged connections while the HVAC blower operates. Torn flexible ducts and gaps around register boots are common locations to examine. Our air duct leak repair team addresses these openings before they waste conditioned air. ENERGY STAR estimates that typical homes lose approximately 20% to 30% of the air moving through their duct systems because of leaks or poor connections.
Air ducts carry conditioned air between heating and cooling equipment and the rooms of a home. When a supply duct leaks, some of that air escapes before reaching its intended outlet. A leaking return duct creates a different problem because it can draw unfiltered air from an attic or crawlspace into the HVAC system.
Finding the location of a leak helps determine whether a simple joint repair is possible or further testing is needed. Weak airflow alone does not prove that a duct is leaking because dirty filters and other restrictions can produce similar symptoms. A systematic inspection helps separate actual air loss from unrelated HVAC problems.
What Causes Air Ducts to Leak?
Air ducts develop leaks when joints separate or the material becomes damaged enough to allow air through unintended openings. Poor installation and movement around duct connections are common causes. Flexible ducts can also tear or disconnect when their supports fail or the material is disturbed.
Loose Connections Between Duct Sections
A duct system contains multiple connections where separate sections meet. These joints may include straight connections or fittings used to change the direction of airflow. If the connection is not properly secured and sealed, conditioned air can escape through the gap.
Duct joints can also deteriorate over time when old sealing materials lose their adhesion. A connection that appears intact from a distance may have a narrow opening along one edge. Inspecting these joints is particularly useful when a nearby room receives less airflow than expected.
Damaged Flexible Ductwork
Flexible ducts contain an inner liner that carries air and an outer covering that protects insulation. The inner liner can tear or become disconnected if the duct is pulled or handled incorrectly. Heavy objects placed on the material may also crush the duct and damage its connections.
A torn outer covering does not always mean that the inner air passage is leaking. However, exposed insulation or a visibly separated connection deserves closer inspection. The condition of the inner liner determines whether air is escaping through the duct itself.
Poor Sealing Around Register Boots
A register boot connects the duct system to a supply or return opening in the wall or ceiling. Gaps can develop where the metal boot meets the surrounding drywall or flooring. These openings may allow conditioned air to enter concealed cavities instead of moving entirely through the grille.
Register connections deserve attention because they are often accessible without opening large sections of the building. A ceiling supply vent may have an intact cover while the boot behind it has gaps around its edges. Inspecting the connection can reveal a leak that is not obvious from the room.
Damaged Duct Sealing Materials
Duct connections sometimes rely on old tape or sealant that has deteriorated. Ordinary cloth-backed duct tape is particularly unsuitable for long-term sealing because its adhesive can fail under HVAC operating conditions. As the tape separates, air may escape through the exposed joint.
Proper HVAC mastic and approved metal-backed sealing tape are designed for duct applications. However, even suitable materials may fail if they were applied to dirty surfaces or over unstable connections. The underlying joint must remain mechanically sound for a lasting seal.
Duct Movement and Poor Support
Ductwork needs suitable support to prevent stress on connections. Flexible sections that sag excessively can pull against collars or fittings. Metal ducts can also develop loose joints when their hangers or supports are damaged.
The resulting problem may involve leakage or restricted airflow depending on how the duct moves. A disconnected branch can release a large amount of conditioned air into an attic. A sharply compressed flexible duct may reduce airflow without creating a leak at all.
What Are the Signs of Leaking Air Ducts?
Leaking air ducts can cause uneven temperatures and reduced comfort when conditioned air escapes before reaching occupied rooms. Energy costs may also increase because the HVAC system must operate under less favorable conditions. However, these symptoms are not unique to duct leaks and should be evaluated alongside the physical condition of the system.
Common warning signs include:
- One room receives noticeably less conditioned air than nearby rooms.
- Heating or cooling bills increase without an obvious change in use.
- Accessible duct connections show visible gaps or separation.
- Air can be felt escaping around a supply duct joint.
- A flexible duct is torn or disconnected from its fitting.
- Unusual dust appears after return-side duct damage.
- The attic or crawlspace receives noticeable conditioned air from a damaged duct.
- Rooms near the end of a duct branch struggle to reach the desired temperature.
- Insulation around an accessible duct connection appears damaged or displaced.
- A whistling sound occurs near a specific duct joint during blower operation.
These signs help identify areas for investigation but do not confirm the amount of leakage. A room may be uncomfortable because of inadequate insulation or a poorly balanced duct system. The most convincing evidence of a leak is an actual opening combined with unwanted air movement through that location.
Where Are Air Duct Leaks Most Likely to Occur?
Air leaks frequently develop at connections because separate duct components must be joined together. These areas may include branch fittings or the connections between the air handler and ductwork. Register boots and damaged flexible ducts are also important locations to inspect.
| Duct Location | Common Problem | Visible Clue |
|---|---|---|
| Supply duct joint | Unsealed connection | Gap or air escaping from the seam |
| Return duct joint | Opening drawing air inward | Separated edges or damaged seal |
| Register boot | Gap around wall or ceiling connection | Opening between boot and building material |
| Flexible duct collar | Inner liner pulled loose | Disconnected or poorly secured liner |
| Air handler connection | Failed seal at equipment transition | Visible seam or damaged mastic |
| Branch duct fitting | Loose connection | Movement or separation at the branch |
| Accessible metal duct | Corrosion or physical damage | Hole or damaged surface |
The most important locations are not always the easiest to see. Ducts may run through finished ceilings or enclosed wall cavities, which limits what a homeowner can inspect safely. Checking accessible connections first can reveal obvious problems without damaging building materials.
How to Find Air Duct Leaks Yourself?
A basic household inspection can locate some visible duct leaks without specialized equipment. The process involves examining accessible ducts and checking for unusual airflow at suspected openings. It cannot measure total leakage or identify every concealed defect, but it provides a useful starting point.
Step 1. Compare Airflow in Different Rooms
Begin by running the HVAC system under normal operating conditions and comparing airflow at several supply registers. Look for noticeable differences between rooms served by the same system. Record any outlets that have become weaker than they were previously.
A weak register may indicate a leaking branch, but it can also result from a closed damper or damaged flexible duct. The observation helps identify which branch deserves inspection. It should not be treated as proof of leakage without supporting evidence.
Step 2. Inspect the Air Filter and Vent Openings
Turn off the equipment before examining the filter or removing an accessible grille. Check whether the filter is heavily loaded and confirm that supply registers are not blocked by furniture. A restricted filter can reduce airflow throughout the home without any duct leakage.
Inspect accessible register openings for obvious gaps around the boot. Use a flashlight to view the nearby connection without forcing tools into the duct. If the surrounding material appears damaged, photograph it before making changes.
Step 3. Examine Accessible Duct Connections
Inspect exposed ductwork in a safely accessible basement or utility area while the system is off. Look for separated joints or missing sections of sealant. Pay attention to branch connections because several duct sections may join at one fitting.
Ducts in attics and crawlspaces require greater caution because access may involve extreme temperatures or unfinished surfaces. Never step between attic framing members or enter a confined space that is unsafe. Avoid disturbing unfamiliar insulation or materials that may contain asbestos.
Step 4. Check for Escaping Air
Once you have identified an accessible suspected supply leak, restore the system to its normal operating setting. From a safe position, move your hand near the outside of the connection and check whether air can be felt escaping. A noticeable stream at a joint suggests that the seal may be damaged.
Use only your hand or another suitable nonhazardous method for this check. Do not use candles or open flames near ductwork to identify air movement. Air escaping through tiny openings may be too subtle to detect by touch, so the absence of a noticeable draft does not prove that a joint is airtight.
Step 5. Look for Return-Side Problems
Return ducts can draw air inward through gaps instead of releasing it outward. This makes return leakage harder to identify through a simple hand check. A visibly separated joint or damaged filter cabinet connection can still provide useful evidence.
Look for dust patterns around accessible return connections and note whether the surrounding space contains loose insulation. These observations do not confirm leakage by themselves. However, they can help identify locations that deserve closer examination.
Step 6. Record Suspected Leak Locations
Photograph visible defects and note which rooms are affected. Record whether the problem occurs during heating or cooling and whether airflow changes after the filter is replaced. This information helps distinguish a recurring duct problem from an isolated operating issue.
Avoid covering suspected openings with ordinary household tape as a temporary repair. It may fail quickly or leave adhesive residue that interferes with proper sealing. The connection should be repaired using materials intended for HVAC ductwork.
Can You Find Duct Leaks Without Special Equipment?
Some leaks are easy to identify without diagnostic tools because the damaged connection is visible or air can be felt escaping. Large separations and torn flexible ducts are common examples. Small openings hidden behind insulation are more difficult to detect without controlled testing.
A visual inspection is particularly useful in unfinished basements where much of the ductwork is exposed. Attic systems may be harder to examine because insulation covers connections and access is limited. Hidden leaks can remain undetected even when every visible joint appears intact.
Feeling for escaping air works best on accessible supply ducts because they often operate under positive pressure. Return-side leaks may draw air inward and produce little noticeable movement outside the joint. This difference explains why a home can have substantial leakage without obvious drafts at visible ducts.
Household observations should therefore be considered screening checks rather than complete measurements of duct airtightness.
How Do Professionals Test Air Ducts for Leaks?
Professional testing can measure duct leakage and help identify openings that are difficult to locate visually. Common methods include duct pressure testing and targeted inspection of accessible connections. The appropriate test depends on whether the goal is measuring total leakage or locating a specific damaged section.
Duct Leakage Pressure Testing
A duct leakage test uses a calibrated fan and pressure-measuring equipment to determine how much air escapes from the system. Registers are temporarily sealed according to the testing procedure so the ducts can be pressurized or depressurized. The required fan airflow provides a measurement of leakage under a defined test condition.
This method produces more reliable information about overall duct airtightness than feeling for drafts. However, a total leakage measurement does not automatically reveal the exact location of every opening. Additional inspection may be needed to identify where repairs should be made.
Leakage Testing to the Outside
Some tests distinguish between total duct leakage and leakage that communicates with unconditioned spaces. This distinction matters because air escaping into an attic has different energy consequences from air leaking into another conditioned part of the home.
A blower door may be used together with duct testing equipment to evaluate leakage relationships. A blower door by itself measures the airtightness of the building enclosure rather than the duct system alone. The testing method should be identified clearly when results are reported.
Targeted Visual and Airflow Inspection
A technician may combine pressure testing with visual examination of accessible ducts. Smoke pencils or other controlled airflow indicators can help reveal air movement near suspected openings when used appropriately. These methods require correct conditions because normal room air movement can affect the results.
Airflow measurements at registers can also identify distribution problems. However, a low airflow reading does not automatically prove a leak because duct restrictions and balancing settings can produce similar results. Test findings should be interpreted together.
How Much Does It Cost to Find Air Duct Leaks in 2026?
Professional air duct leak testing typically costs $115 to $450 in the United States during 2026, with an average near $325. The price depends on the size of the home and the type of test performed. More involved inspections may cost extra when concealed ductwork requires additional evaluation.
| Inspection or Test | Typical 2026 U.S. Cost |
|---|---|
| Basic air duct inspection | $140 to $380 |
| Professional duct leakage testing | $115 to $450 |
| Camera inspection of ducts | Approximately $150 to $300 |
| More extensive duct inspection | Depends on testing scope |
| Duct sealing after leaks are confirmed | $500 to $4,000 for many projects |
These costs represent different services and should not automatically be added together. A basic visual inspection may identify an obvious disconnected duct without specialized testing. More extensive testing becomes useful when hidden leaks or the overall leakage rate need to be measured.
The cost of finding a leak is separate from the expense of repairing it. A simple accessible connection may require limited sealing, while damaged ductwork hidden behind finished materials can involve additional work.
How Can You Tell a Duct Leak From a Blockage?
Duct leaks and blockages can produce similar airflow symptoms, but they affect the system differently. A leak allows air to escape or enter through an unintended opening. A blockage restricts movement through the duct passage itself.
| Condition | What Happens | Common Clue |
|---|---|---|
| Supply duct leak | Conditioned air escapes before reaching a room | Visible gap or escaping air |
| Return duct leak | Unfiltered air enters through damaged joints | Separated return connection |
| Dirty filter | Airflow resistance increases near the equipment | Heavy filter loading |
| Closed damper | Airflow is restricted intentionally or accidentally | Weak branch with closed control |
| Crushed flexible duct | Passage becomes narrowed | Visible compression or sharp bend |
| Disconnected supply duct | Air is released into another space | Little airflow at the intended register |
Finding the correct cause prevents unnecessary repairs. Sealing a sound duct will not remove a blockage, while cleaning an unobstructed duct will not repair a disconnected connection. The physical condition of the affected branch determines the appropriate next step.
When Should You Call an HVAC Professional?
Professional testing is appropriate when airflow remains weak despite checking the filter and accessible registers. It is also useful when ducts are concealed or when several rooms show unexplained temperature differences. A technician can measure leakage and determine whether the problem involves damaged ductwork or another HVAC condition.
An inspection is particularly important when significant return-side leakage may affect a home with fuel-burning appliances. Changes to duct pressure can interact with combustion appliance venting under certain conditions. A qualified technician can evaluate those safety considerations before extensive duct modifications are made.
Professional help is also appropriate when ductwork is located in an unsafe attic or crawlspace. Extreme heat and unstable access conditions can make household inspection hazardous. Hidden joints should not be exposed by cutting building materials without an appropriate plan.
How Can You Prevent New Air Duct Leaks?
Preventing air duct leaks involves keeping connections secure and protecting exposed duct sections from physical damage. Proper sealing materials help maintain airtight joints, while suitable supports reduce stress on flexible ducts. Regular inspection of accessible connections can identify damage before it becomes extensive.
Keep Duct Supports in Good Condition
Flexible ducts should be supported according to their installation requirements and arranged without severe bends. Excessive sagging can place stress on collars and create airflow restrictions. Inspect visible sections during normal HVAC maintenance and note any connections that appear stretched or displaced.
Protect Exposed Ductwork
Avoid storing heavy objects on ductwork or using ducts as support when moving through an attic. Flexible liners can tear when compressed or pulled. Metal ducts may also develop damaged joints if they are struck or moved during renovation work.
Inspect Connections After Remodeling
Construction activity near concealed or exposed ducts can disturb previously secure connections. Check accessible sections after major renovation work and look for visible damage. If airflow changes soon after the project, record which rooms are affected so the problem can be investigated.
Maintain the HVAC Filter
Inspect the filter according to the equipment manufacturer's recommendations and replace it when necessary. A dirty filter does not directly create a duct leak, but it can produce weak airflow that resembles duct damage. Keeping filtration maintained makes changes in duct performance easier to identify.
Conclusion
Finding air duct leaks begins with checking accessible connections and identifying unusual air movement around damaged joints. Weak room airflow can provide a clue, but it does not prove that a leak exists. Professional pressure testing can measure hidden leakage when visual inspection is insufficient. Correctly identifying the problem prevents unnecessary repairs. This week, inspect safely accessible duct joints and record any visible separation.